
Choose a verified data protocol
Selecting the right data union protocol is the foundation of getting paid. In a space where scams are common, verification is your only real protection. You are not just signing up for a newsletter; you are connecting a digital wallet to a smart contract that handles your financial data. If the protocol is not legitimate, your data—and potentially your funds—are at risk.
Focus on protocols that have undergone public, third-party smart contract audits. These audits are performed by independent security firms that review the code for vulnerabilities before deployment. A verified audit report is the closest thing to a "safety seal" in the decentralized world. Without it, you are operating in the dark. Avoid any platform that promises high returns but cannot produce a verifiable audit from a reputable source.
Only use protocols with public, third-party smart contract audits. Unaudited data unions carry high financial risk.
When evaluating options, look for transparency in how data is collected and compensated. Legitimate data unions clearly explain what data they collect, who buys it, and how the revenue is distributed to members. This clarity should be easy to find in their documentation or whitepaper. If the terms are vague or hidden, move on.
The image below shows a typical interface for enrolling in a data union. While the specific branding may vary, the core process is similar across verified platforms: you connect your wallet, review the data permissions, and confirm your participation in the network.
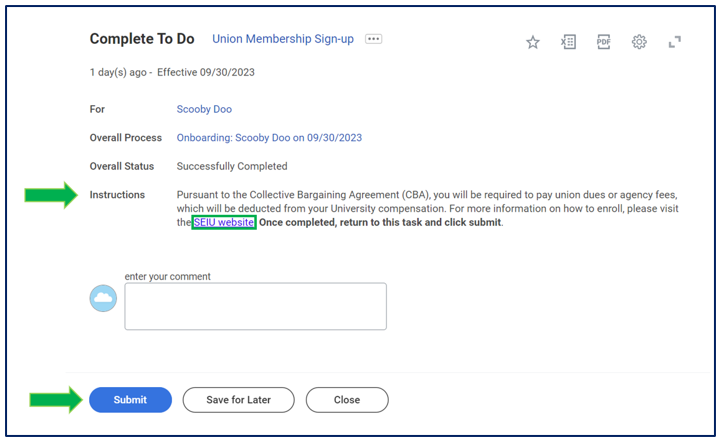
Connect your wallet and sign consent
To participate in a data union, you must first establish a secure digital identity. This process links your cryptocurrency wallet to the union’s platform and explicitly grants permission for your data to be aggregated and monetized. Unlike traditional employment, where an employer collects data internally, data unions operate on public blockchains. This means every action you take—connecting your wallet and signing the consent agreement—is a transparent, on-chain transaction.
The setup requires a self-custody wallet, such as MetaMask or a hardware wallet like Ledger. These tools allow you to control your private keys without relying on a centralized exchange. Once installed, you will navigate to the data union’s official interface. Look for the "Connect Wallet" button, usually located in the top-right corner. Select your provider and approve the connection request in your wallet extension. This step verifies your identity and creates a unique digital address for your membership.
After connecting, you will encounter the data consent interface. This is the most critical part of the setup. You will see a summary of the data types the union intends to collect, such as browsing history, location data, or purchase records. Read this carefully. It is not a generic terms-of-service agreement; it is a specific data-sharing contract. When you are ready, you will click "Sign" or "Approve." This action generates a cryptographic signature, proving you voluntarily agreed to the terms. This signature is stored on the blockchain, creating an immutable record of your consent.
Be aware that signing a transaction may require a small gas fee to process on the network. Ensure your wallet has enough native cryptocurrency (like ETH or MATIC) to cover this cost. Once the transaction is confirmed, your wallet is officially linked to the data union. You are now ready to enable data sharing and begin earning rewards. Keep your private keys secure; they are the only way to access your membership and any future payouts.
Configure data sharing preferences
Treat your data like a bank account: you control the withdrawals. In a data union, your payout depends on the granularity of the information you authorize. Broad, vague permissions often result in lower compensation because the data is less valuable to buyers. Conversely, highly specific data commands a premium but increases privacy risk.
To maximize earnings, you must actively curate your sharing settings. Start by identifying which data types are most lucrative. Generally, purchase history and precise location data pay more than general browsing habits because they offer concrete insights into consumer behavior. However, sharing financial transaction details carries higher sensitivity. You should only enable these if the union’s privacy safeguards are transparent and the compensation justifies the exposure.
Adjust your preferences in the user dashboard before each payout cycle. Many unions allow you to toggle specific categories on or off. For example, you might enable "location data" only when you are in specific retail zones, or share "browsing history" only for non-sensitive industries. This targeted approach ensures you are compensated for high-value signals while keeping sensitive information private. Regularly review these settings, as union payout structures and data demand can shift based on market needs.
| Data Type | Typical Payout | Privacy Risk |
|---|---|---|
| Browsing History | Low | Low |
| Location Data | Medium | Medium |
| Purchase History | High | High |
| Financial Transactions | Very High | Very High |
Track payouts and withdraw earnings
Get Paid by Data Unions works best as a clear sequence: define the constraint, compare the realistic options, test the tradeoff, and choose the path with the fewest hidden costs. That order keeps the advice usable instead of decorative. After each step, pause long enough to check whether the recommendation still fits the reader's actual situation. If it depends on perfect timing, unusual access, or a best-case budget, include a simpler fallback.



Avoid common data privacy mistakes
The easiest mistake with Get Paid by Data Unions is comparing options on the most visible detail while ignoring the day-to-day constraint. A choice can look strong on paper and still fail because it is too hard to maintain, too expensive to repeat, or awkward in the actual setting. Use the same checklist for every option: fit, cost, durability, timing, upkeep, and fallback plan. That keeps the comparison practical instead of drifting into preference alone.
The simplest way to use this section is to write down the real constraint first, compare each option against it, and choose the path that still works outside ideal conditions.
Verify earnings and tax obligations
Data union payouts are taxable income, just like traditional wages. The IRS treats crypto and token rewards as property, meaning you must report the fair market value in USD at the exact moment you receive the payment. Failure to report these transactions can lead to audits and penalties, so accurate record-keeping is essential from day one.
Start by tracking every transaction. Most data union platforms provide a payout history dashboard; export this data monthly. If you receive payments in stablecoins or volatile tokens, use a reputable crypto tax calculator to determine the USD value at the time of receipt. Keep screenshots or PDF receipts of each distribution as proof of income.
Consult a tax professional familiar with digital assets. Standard tax software may not handle complex DeFi or union-specific token rewards correctly. A CPA can help you classify these earnings as self-employment income or ordinary wages, ensuring you pay the correct amount of income and self-employment tax.
Frequently asked questions about data union pay
Understanding how data union compensation works requires looking at the specific mechanics of collective bargaining agreements (CBAs) and payroll processing. Unlike traditional employment where pay is set by individual negotiation, data union pay is standardized across membership tiers.
No comments yet. Be the first to share your thoughts!